Monday, September 27, 2010

It's been a while...

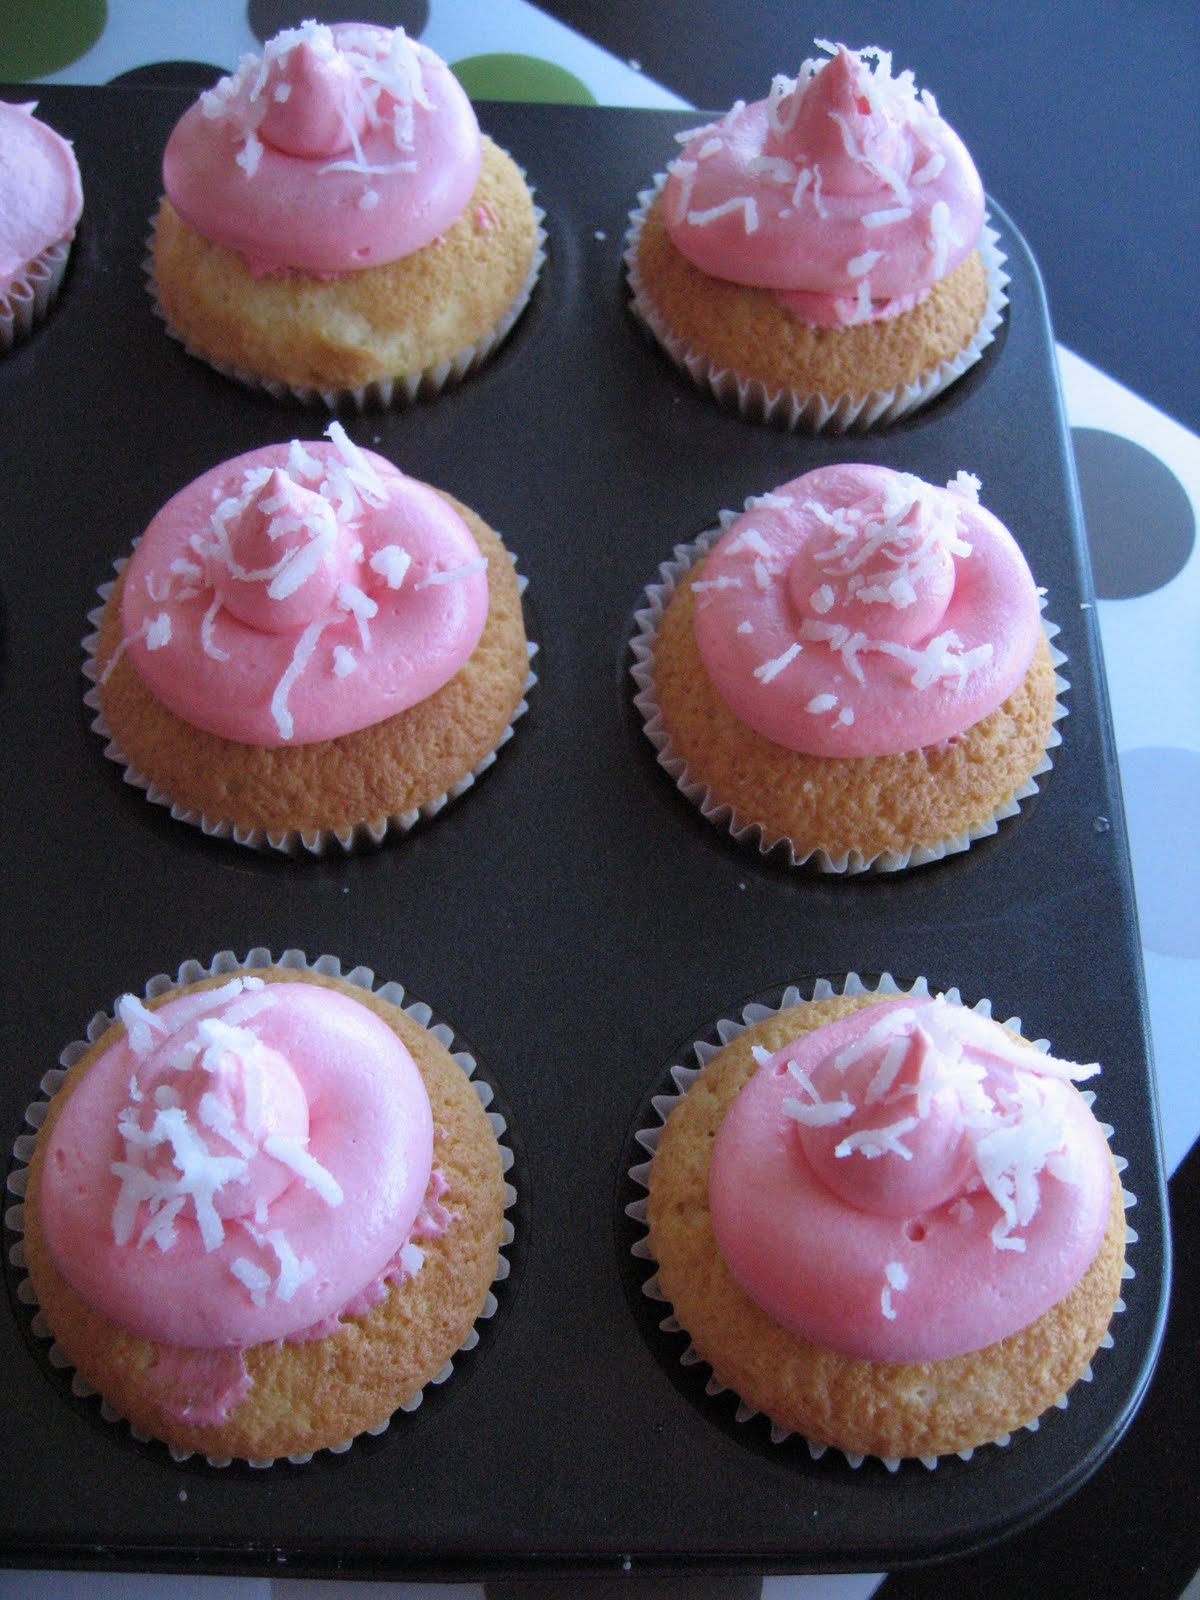
Yes, yes...it's been a very long time since we have written anything at all. Things were put on halt just because. But before we stopped baking for a short while, our latest order was for my (Fran) nephew's 1st birthday on August 21st. We had an order of 9 dozen cupcakes...a variety of red velvet, cookies and cream and strawberry shortcake...regular sized and minis.

To begin, let me tell you that it was a lot of work to get the cupcakes out to Montclaire in Oakland by 11 A.M., but it was so much fun! Annie and I totally planned things out to get all of our ingredients in order, packed our baking supplies and headed out to the kitchen at 6 A.M.

After 4 hours of prepping, baking, frosting and clean up...this is what we got!
I think I much prefer the regular sized ones to the minis, which ones were on the dryer side. We made them because they were requested, but I think we will stick to making only regular sized ones. Stay tuned (it might take us a while) for our website with our menu. But in the meantime, if you have a need for some cupcakes and would like to order, just email us at schweetcake@gmail.com


Wednesday, July 28, 2010

Gum Paste and Fondant Class Completed!!!


I had taken a Wilton basic cake decorating class at Michael's a couple years back and really wanted to move on to the next class because Annie and I have been baking more and I wanted to learn how to add more flare to our cupcakes. Watching Ace of Cakes really inspired me to take this class too. The class is only 4 sessions long, every Wednesday night for a month. I figured I could squeeze that into my schedule somehow. Shouldn't be hard, right?
At first I thought, this would be easy to go to class from 6:30pm-8:30pm once a week. It turned out to be quite a challenge. Prepping for the class everyday beforehand was what made it hard. To find the time to go to Michael's and use their lovely 40% off coupons for one item, which you could only use once a day, and luckily I live 2 minutes away...and then to have my gum paste and fondant colored in advance so that in class I would have sufficient time to make my flowers. I found myself scrambling every Wednesday after work, right before class putting together all of my materials. I'll spare you the details of my day today, but I honestly thought that my cake would end up looking like crap because it was such a rush job to bake the cake, level it, fill and frost it and get the fondant colored and layed out on the cake. I felt like I was in one of those competitions you see on the Food Network.

Well, in the picture above, it turned out looking better than I thought. Just don't take a really close look because you'll see all the imperfections in the fondant and the flowers. Good for the first time...I will definitely do better on the next one! I'm skipping August for a breather and then in September...Wilton's Flower and Cake Design class! Woohoo!

Sunday, July 25, 2010

Strawberry Shortcake - it's a BIG deal


The first time that I made these Strawberry Shortcake cupcakes I called Fran and was telling her how fantastic the final product was. Fran thought I was going crazy over nothing, but today we remade the recipe and now she knows why I was making them a big deal.

Basically, same recipe as already before except this time we put some strawberry puree in the batter as well. We loved the look of the cake with the strawberry puree...a light brownish color. It compliments the pink strawberry frosting.

This time we also added a strawberry garnish fanned out in 3 pieces with a peppermint leaf.

Everything about this recipe was perfect...moist, fluffy, not too sweet, geniune strawberry flavor, and great presentation.

Light and fluffy!

It's been quite some time since I've actually posted something. I finally found time to squeeze in some baking last week, but had no time to actually put up a post.

So I've been trying to get my recipe right for a good and moist red velvet. I think I'm close, sorta. I don't know. This one I made was more moist than my previous ones, but still not quite what I would like. The frosting isn't your traditional cream cheese frosting. Although I like the cream cheese flavor and the fact that the normal frosting crusts up, it's way too sweet. So this time I took a swiss meringue frosting and added cream cheese to it. It came out very yummy and fluffy, but perhaps not enough cream cheese. I'll have to try adding a little more next time. The fluffiness of the frosting goes well with the denseness of the cake though I think. It's a nice balance. Only thing is that it doesn't hold up quite as well as I'd like it to when it's warm outside. Gotta work on that part.

So here we are with my second attempt at a coconut cupcake. The first time I made it, I had used coconut milk and the cake came out way too dense...me no like! So this time around, Annie gave me her coconut extract to try out and it was much better. I had baked this about 3 days prior to actually frosting it with the same cream cheese swiss meringue that I had used for the red velvet. Funny thing is that the cupcake was much more moist on the third day than it was on the first. I didn't like it all the first day...it was too dry. Seems like the sugars started coming out more after a few days. And again...the fluffy frosting went very well with the cake.

Thursday, July 15, 2010

Cookies and Cream cupcake!

Today I made a Chocolate cupcake with a marshmallow fluff filling with a Cookies and Cream mascarpone frosting.

My goal was to try to make the most moist and fluffy cupcake ever. This is the first time I've incorporated three techniques that should make a moist cake: 1. Used cake flour instead of all-purpose flour
2. Used oil instead of butter
3. Folded in whipped egg whites instead of beating the whole egg in the batter

I have to say the cupcake was super yummy, but I am highly critical of my own creations. The cake portion could be more moist so more oil next time. Also, it could use a bit more cocoa for a stronger chocolate flavor. The marshmellow fluff filling and the frosting were equisite...so light and super yummy. The filling and frosting both had similar tastes, so perhaps next time I can try to make them a different flavor (maybe caramel). When I ate the cake with the filling and the frosting together, it really does melt in your mouth.

Ingredients

Cake
1. 1/2 cup plus 2 tablespoons cake flour
2. 1/3 cup unsweetened Dutch-process cocoa
3. 1/2 teaspoon baking powder
4. 1/4 teaspoon baking soda
5. Pinch of salt
6. 2 large eggs, separated
7. 1/3 cup canola oil
8. 1/2 cup plus 2 tablespoons sugar
9. 2 tablespoons water


Filling
1. 3 tablespoons unsalted butter, softened

2. 3/4 cup Marshmallow Fluff
3. 1 1/2 tablespoons plus 1 teaspoon heavy cream


Frosting
1/4 cup softened butter
1 8 ounce container mascarpone, at room temperature
3 tablespoon of shortening
Fold in 1 crushed oreo cookies

1. MAKE THE CUPCAKES: Preheat the oven to 350°. Spray a 12-cup nonstick muffin pan with vegetable oil spray. In a medium bowl, sift the flour and cocoa with the baking powder, baking soda and salt. In another bowl, using an electric mixer, beat the egg yolks with the canola oil, 1/2 cup of the sugar and the water. Beat in the dry ingredients at low speed until smooth.
2. In a clean bowl, using clean beaters, beat the egg whites at high speed until soft peaks form. Add the remaining 2 tablespoons of sugar and beat until stiff and glossy. Beat one-fourth of the whites into the batter, then fold in the remaining whites until no streaks remain. Spoon the batter into the muffin cups, filling them halfway. Bake for 15 minutes, or until the cupcakes are springy when touched. Let the cupcakes cool for 5 minutes, then turn them out onto a wire rack to cool completely.
3. MAKE THE FILLING: In a medium bowl, beat the Marshmallow Fluff, butter, and 1 1/2 tablespoons of the heavy cream at medium speed until fluffy.
4. Using a pear knife, cut out a scope of the cupcake. Using a spoon, add a small spoonful of filling into the cupcake and then replace the top back on the cake.
5. MAKE THE FROSTING: Beat the mascarpone cheese, shortening, and butter together until creamy. Then fold in the crushed oreo cookies. Do not overbeat as it will make the frosting to look gray.

Saturday, July 10, 2010

Another Red Velvet...


We're on a mission to create a moist red velvet! Most recipes that you'll find online are very dry, so I decided to create my own, based by taking bits and pieces of recipes and putting it together. This one I made was almost there. It was relatively moist, but just a few more tweaks and I think it'd be perfect! I haven't had the perfect one yet, even from a bakery. Sprinkles is good, but it's a bit too greasy. As you may already know, red velvet is supposed to be dense, but I kind of want mine to be a little bit more fluffy like the Duncan Hines Moist Deluxe Red Velvet. Yes, I like the cake from a box...

I wish I could say that I adapted this recipe from somewhere, but it's kind of hard for me to pin point where I got it. I just made it up...

½ C (1 stick) room temp butter

1 ¼ C vegetable oil

1 C sugar

4 eggs

1 ½ t vanilla extract

3 T cocoa powder

2 Tbsp red food coloring - I use Smart and Final's coloring, so it's a bit more concentrated

15 oz (4 C) cake flour

1 ½ t salt

1 ½ c buttermilk

1 ½ t baking soda

1 ½ t vinegar


Preheat oven to 350. Line cupcake pans with liners. Sift flour and salt and set aside. Cream butter and sugar until very fluffy and pale. Mix in oil and buttermilk. Add eggs one at a time, scraping often. Scraping is the most important thing you can do to make this came come out right! Mix together vanilla, red, and cocoa and add gradually with the mixer going. Scrape again. On low, add the flour in three additions, scraping after each time. Take the mixture off the machine and mix by hand, making sure the bottom of the bowl has been scraped completely. In a small dish, quickly mix soda and vinegar. Pour into the cake batter and fold in by hand completely. Work quickly but thoroughly. If the soda is not completely incorporated, the cake will not rise evenly. Scoop into cupcake pans (about 2/3 full) and bake immediately. Should take about 15-20 minutes. Cake should spring back when touched and a cake tester should come out clean.


And to top off a red velvet cupcake, you have to have cream cheese frosting! I don't know about you, but most of the recipes out there have way too much powdered sugar in them, making it too sweet. The only thing I like about them is the sugary crust. So to make it less sweet, I was thinking of either a Swiss meringue base, but I decided to try out Annie's mascarpone suggestion this time around. I went searching for a recipe and found one at Epicurious.com and I made a couple minor changes. Oooh it is yum yum!


Mascarpone Cream Cheese Frosting

1 cup (2 sticks) unsalted butter at room temperature
1 cup (8 ounces) cream cheese at room temperature
2 cups powdered sugar
1 teaspoon vanilla extract
Pinch of salt
1 cup (8 ounces) mascarpone (Italian cream cheese, available at most grocery stores)


In the large bowl of an electric mixer fitted with the paddle attachment, beat the butter, cream cheese, and powdered sugar on medium-high speed until light and fluffy. Beat in the mascarpone on very low speed until just combined. (Be careful; once you've added the mascarpone, excessive beating can make the frosting curdle.) Stir in the vanilla
.


Chewy and Crispy Oatmeal Toffee Choco Chip Cookie

I needed to break away from the cupcakes...just a short bit...

I started off baking cookies years ago, and I'd have to say my best cookies are oatmeal raisin and oatmeal chocolate chip. Now with the toffee, it's a little bit more exotic! It was several months ago when a friend of mine sent me an oatmeal toffee chocolate chip recipe that he got from someone else. I made it the way the recipe had directed and it was a bit too greasy for me with all the butter. So this time around I reduced the butter a little bit and it was much better. This cookie is soooo good, I couldn't have just one!

They turned out very crispy on the outside and chewy on the inside, just how I like it. The toffee adds a nice flare to the cookie. The first batch in, I only baked for 10 minutes, the second batch for about 12. You can see the difference in the cookies in the picture here. I like the one that was left in longer. It was a bit more crispy, even the next day. But if you like your cookie a little bit more chewy, take it out at 10.


Oatmeal Toffee Chocolate Chip Cookies

1 ½ all-purpose flour
1 tsp. baking soda
3/4 c. salted butter

½ c plus 2 Tbs. granulated sugar
½ c plus 2 Tbs. light brown sugar
1 egg

1 tsp pure vanilla extract

1 ½ c. oatmeal

1 c. semi-sweet chocolate, coarsely chopped

1 c. toffee pieces (5 ½ oz.)


Heat oven at 350 degrees. Sift together flour and baking soda and set aside. In the bowl of an electric mixer, fitted with the paddle attachment, cream butter and sugars on medium-high speed until light and fluffy, 2 to 3 minutes. Scrape down the sides of the bowl once or twice during the mixing.

Add egg and mix on high speed to combine. Add vanilla extract; mix to combine. Scrape down the sides of the bowl. Add the sifted flour, a bit at a time, on a low speed until well combined. Add oatmeal, chocolate, and toffee pieces; mix to combine.

Scoop with cookie scoop and bake on parchment-lined baking sheets until golden brown, 10 to 12 minutes. Remove from oven and transfer to a baking rack to cool. Makes about 3 dozen.

Sunday, July 4, 2010

Strawberry Shortcake Cupcake

I'm so excited about my Strawberry Shortcake Cupcake! My inspiration came from eating a Strawberry Shortcake cupcake from Cups and Cakes Bakery. No joke - it was so delicious! The recipe is from www.stickygooeycreamychewy.com.

I had to make some changes to the recipe because the strawberry gelee (the filling) tasted horrible with powdered gelatin. I had to redo the filling by puree-ing frozen strawberries and did a reduction to make it thicker. So instead of thickening the sauce with gelatin, I just simmered it much longer.

I also altered the frosting, too. I added 2 tablespoon of Crisco shortening. The frosting was great! I'm starting to realize that a lot of people don't really like things too sweet. This frosting was very light, fresh, and had a great strawberry taste.

Overall, this cupcake was awesome. There are 3 parts: cupcake, filling, and frosting. I LOVED IT! Here's the tweaked recipe.


Magnolia Bakery’s Vanilla Cupcakes
1 1/2 cups self-rising flour
1 1/4 cups all-purpose flour
1 cup (2 sticks) unsalted butter, softened
2 cups sugar
4 large eggs, at room temperature
1 cup milk
1 teaspoon pure vanilla extract

Directions:
Preheat oven to 350 degrees. Line two 12-cup muffin tins with paper liners; set aside. In a small bowl, combine flours; set aside. In the bowl of an electric mixer fitted with the paddle attachment, cream butter until smooth and creamy. Gradually add sugar, beating until fluffy, about 3 minutes. Add eggs, one at a time, beating well after each addition. Add dry ingredients in 3 parts, alternating with the milk and vanilla, and scraping down sides of bowl in between each addition; beat until ingredients are incorporated but do not overbeat.

Divide batter evenly among liners, filling about three-quarters full. Bake, rotating pan halfway through, until a cake tester inserted in the center comes out clean, 20 to 25 minutes.
Transfer to a wire rack to cool in tins for 15 minutes. Remove cupcakes from tins, and cool completely on rack. Once cupcakes have cooled, frost as desired.
Makes about 2 dozen cupcakes.

Strawberry Filling
1 cup strawberry puree
1/4 cup sugar
1 tablespoon lemon juice
1/2 cup diced, fresh strawberries

Directions:
Heat puree and sugar in a small saucepan just until it begins to bubble, stirring to dissolve sugar. Stir in lemon juice and remove from heat. Stir in diced strawberries and chill until set.

Strawberry Mascarpone Frosting
1/4 cup softened butter Add Image
1 8 ounce container mascarpone, at room temperature
1/2 cup fresh strawberries, pureed
2 tablespoons strawberry jam
2-3 cups powdered sugar


Directions:
Cream butter and cream cheese in an electric mixer until soft and fluffy, about 2 minutes.
Add the strawberries and jam. Mix until combined. Add the powdered sugar, 1 cup at a time until the frosting has the sweetness and consistency you desire. If your frosting is not stiff enough to pipe, add more powdered sugar.


Thursday, July 1, 2010

Coconut cupcake with cream cheese frosting

Last night I kept dreaming about baking, and then I woke up and started dreaming about baking again. But then I also had a dream with Demi Moore and Ashton Kutcher being in love while the Damn Yankee's song "Can You Take Me High Enough" played in the background. So I woke up wanting to bake and play the Damn Yankee song on my iTunes.

Today I baked a Coconut cupcake with cream cheese frosting, a recipe I found on
The Joy of Baking website. Unlike many other recipes, this one calls for cake flour. I did make one rookie mistake though. The recipe called for 1 cup of sugar divided in half. Instead I added the whole cup to the batter and didn't divide the other half for the egg white section. So lession learned: always pre-read the recipe before baking.

At the end when the cupcakes were out of the oven and cooled off, I had a bite - and it was fabulously fluffy, light, moist, and not too sweet (considering I added more sugar). I think the cake flour really was key in giving the cupcake a fluffy texture. Also, the separation of the egg whites and yolks is also suppose to give the cake more volume and a lighter texture.

This is probably one of the best ones I've baked so far!! The frosting is pink because I didn't want white on white color scheme. Instead, I should've toasted the coconut shreads which would give it more color. Next time!

Below is the recipe from
The Joy of Baking.


White Cupcakes:
1
3/4 cups (175 grams) sifted cake flour
2 teaspoons baking powder
1/4 teaspoon salt
1/2 cup (113 grams) unsalted butter, at room temperature
1 cup (200 grams) granulated whitesugar, divided
2 large eggs, separated
1 teaspoon pure vanilla extract
1 1/2 teaspoons of grated lime or lemon peel (optional)
1/2 cup (120 ml) milk
1/8 teaspoon cream of tartar

Cream Cheese Frosting:
2 1/3 cups (270 grams) confectioners sugar (icing or powdered sugar), sifted
3 tablespoons (45grams) unsalted butter, room temperature
1/2 teaspoon pure vanilla extract
4 ounces (113 grams) cream cheese, cold

Garnish:
Flaked or shredded coconut (can use sweetened or unsweetened coconut)


1. WhiteCupcakes:Preheat oven to 350 degrees F (177 degrees C) and lightly butter or line 12 muffin cups with paper liners.

2. Separate the eggs while they are still cold, placing the yolks in one bowl and the whites in another bowl. Cover the two bowls with plastic wrap and allow the eggs to come to room temperature before using (about 30 minutes).

3. In a mixing bowlsiftorwhisktogether the flour, baking powder, and salt. Set aside.

4. In the bowl of your electric mixer, or with a hand mixer, beat the butter until soft (about 1-2 minutes). Add 3/4 cup (150 grams) of the sugar and beat until light and fluffy (about 2-3 minutes). Scrape down the sides of the bowl. Add egg yolks, one at a time, beating well after each addition.Scrape downthe sides of the bowl.Beat in the vanilla extract andlimepeel (if using). Then,with the mixer on low speed, alternately add the flour mixture and milk, in three additions, beginning and ending with the flour.

5. In a clean bowl of your electric mixer, with the whisk attachment, (or with a hand mixer) beat the egg whites until foamy. Add the cream of tartar and continue beating until soft peaks form. Gradually add the remaining 1/4 cup (50 grams) of sugar and continue to beat until stiff peaks form. With a rubberspatulagently fold a little of the whites into the batter to lighten it, and thenfoldin the remaining whites until combined. Do not over mix the batter or it will deflate.

6. Evenly fill the 12 muffin cups with the batter and bake for about 18-20 minutes or until nicely browned and a toothpick inserted into a cupcake comes out clean. Remove from oven and place on a wire rack to cool completely. With a knife or offset spatula, spread frosting on each cupcake. If you want to pipe the frosting, I like to use a large Wilton 1M (open or closed) star decorating tip. Garnish with coconut. These cupcakes are best the day they are made but they can be stored in the refrigerator for a few days. Bring to room temperature before serving.

7. Cream Cheese Frosting:In an electric mixer, or with a hand mixer, cream the butter until smooth and well blended. Beat in the vanilla extract. With the mixer on low speed, gradually beat in the sugar.Scrape downthe sides of the bowl. Add the cream cheese and beat on high speed until frosting is light and fluffy (about 3-5 minutes).

Tuesday, June 29, 2010

Berkeley Cupcake Adventure

It was a gorgeous Sunday afternoon, a perfect day for a cupcake adventure...it's with me, Annie and her boyfriend, Brian. He was coming along to eat the leftover cupcakes that we couldn't finish.

We figured we'd go grab lunch at
Cheeseboard and then off to tantalize our taste buds with cupcakes. We totally forgot that Cheeseboard is closed on Sundays, and as we wandered down the street trying to figure out our lunch options, we stumbled upon a $7.95 All You Can Eat sign at Mint Leaf. Score! Cheap eats and it's a buffet! Annie and I made sure we didn't eat all we could eat...must leave room for cupcakes!

Our first cupcake stop...
Love At First Bite

I had been here before and thought
it was good. They have flavors such as Matcha Green Tea, Mudpie, Red Velvet, Chocolate Peanut Butter...the list goes on. We decided that we would get 2 cupcakes at each stop, which would end up being quite a bit of sugary consumption for the whole week!


Here's what we got:


Chocolate cupcake with a fluffy meringue buttercream, topped with toasted coconut. $3

Hummingbird, a Southern cupcake which consists of banana, pecans and pineapple with a cream cheese frosting. $3


Our thoughts? The chocolate cake was soft, not too dense, not too sweet. The frosting, as described, was definitely fluffy and marshmallow-like. The only thing about it was that we had expected it to have a coconut flavor from the flakes, but there was none at all. It just provided a coconut texture. A bit disappointed there. :(

The Hummingbird, too, was not too sweet of cake but it was on the dense side, as banana
cakes tend to be. Brian was the first to point out that the frosting was a bit grainy. The pecans and bananas were definitely there, but no sign of pineapple.

So we hop in our car and off to the next cupcake joint. But before we reach our destination, we get rear ended. A not quite intended addition to our cupcake tour of course.
A slight derailment, but then we're off on our way again to our second stop...

Cupkates, the Bay Area's first mobile cupcakery.

You can easily find out where they're going to park for the day by check out their website or following them on Twitter. They were located on 4th in Berkeley that day. It was about 3:30pm and we strolled up to the truck with excitement, only to find
that they had sold out of all flavors except for the Salted Caramel and the Double Chocolate. If only it weren't for that fender bender, we could have tried other flavors, like the S'Mores or Lemon Raspberry.

We were in need of something that would WOW us...and for merely $3, WOW we got, when our mouths had the joyous union with the oh so soft and moist chocolate cake and the light and fluffy caramel frosting with a slight hint of sea salt. I'm drooling just thinking about it as I write this blog. The one thing about the cake that I wish it did was hold up while splitting it up. It was so moist, it just crumbled apart when picked at.

This cupcake has got to be the best we have ever had.


Annie said, "WOW!"


And of course, by this time, it's 4pm, we're pooped and our tummies were not happy with the amount of sugar we've had. Our original intentions of visiting 3 cupcakeries, was cut short. Until next time...

Saturday, June 26, 2010

Say Cheese :-)

I'm on a roll...I keep pumping these babies out of the oven (and no, I'm not pregnant). I try to find recipes and inspiration from just surfing the net and seeing what others are baking. There are so many that I am planning on trying. I will get to them soon.

Anyway, today Brian and I went to Tiburon for a company BBQ. Too bad Team USA lost :-) Boo! So for the BBQ, everyone is expected to bring a dish. Of course, I saw this as an awesome opportunity to bake more and have people eatting it.

Today's menu is Mini Cheesecakes. Super simple recipe, but I had one problem with it. The cookie crust tends to fall apart easily. There were two types: 1. Honey Graham Crackers and 2. Oreos. I realized that after the cheesecakes are baked, it's best to refrigerate them for a few hours before consuming. I also added strawberry jam to the top to give it flavor. I must they it was pretty delish and I love that they are bite size.